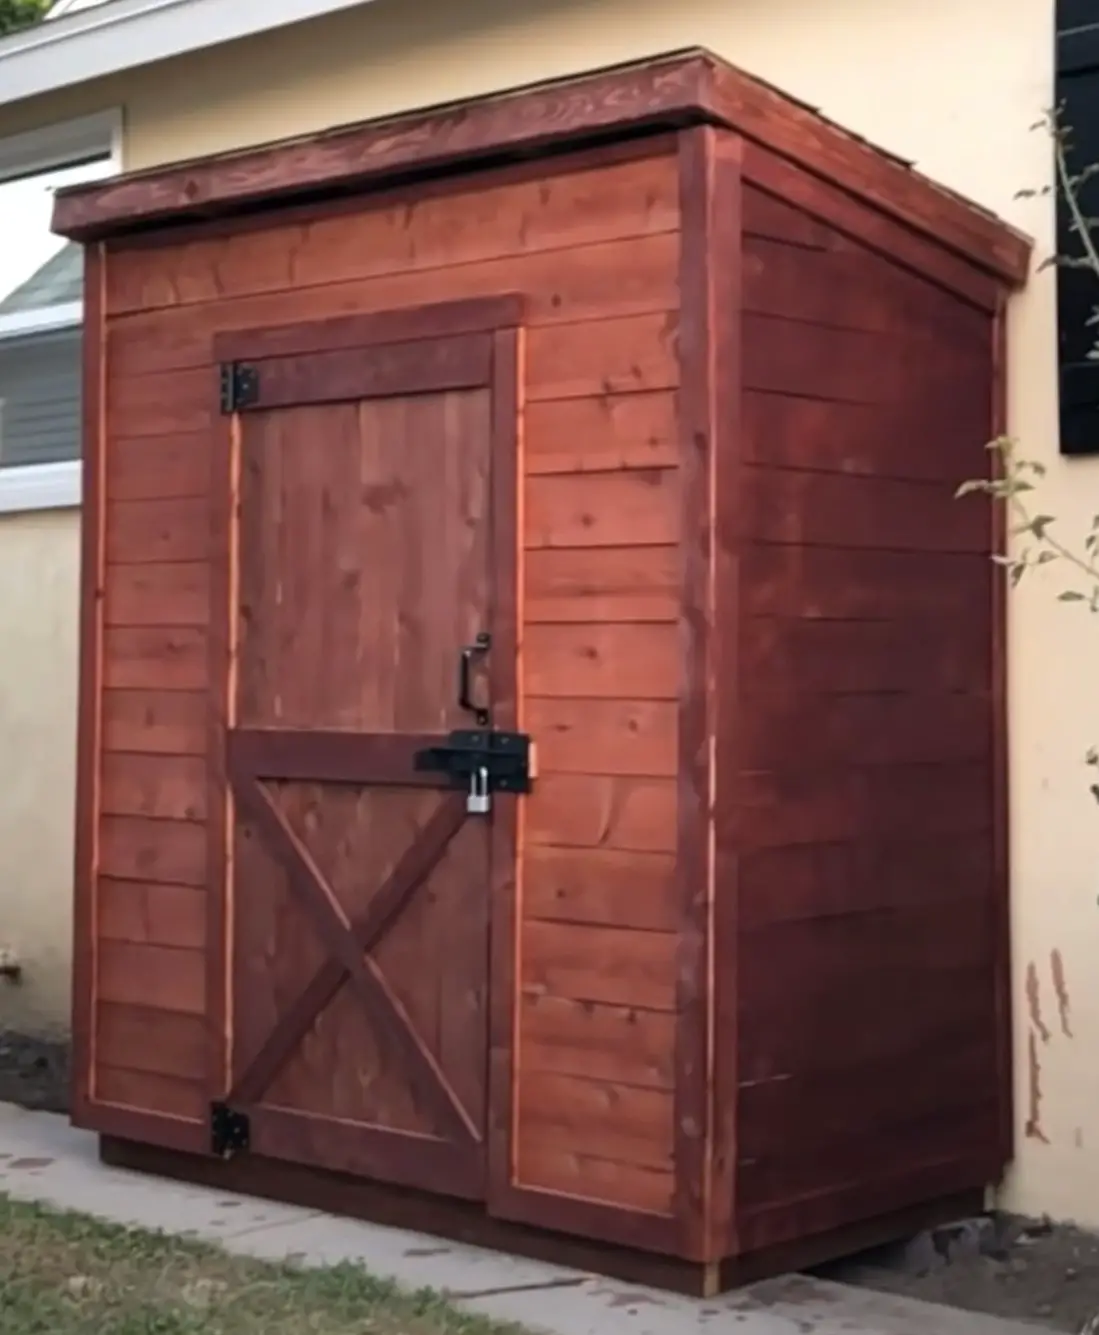
Building a DIY cheap shed from scratch will save you money versus prefabricated (prefab) modular construction storage sheds that will only save you time, but not money. It’s cheaper to build your own shed and save money on labor and materials than it is to buy a prefab shed kit. In this article, we’ll share the 8 steps for a DIY cheap shed build using inexpensive materials and low cost construction costs.
A DIY cheap shed build can be completed for less than $500, if you are able to find free or very cheap materials, keep it small, and do the labor yourself. Quality prefab kits for basic storage sheds start at about $1000 and you still need to assemble it.
Build a cheap shed by saving on materials and labor instead of buying a prefab shed kit. Save money on wood storage sheds with upcycled wood or pallets, do the labor yourself, or choose a cheaper material. Storage shed kits save time but not money.
Cheapest Way To Build A Shed
Building a cheap shed means you need to keep costs to a minimum while still getting the best quality you can afford. The material your shed is constructed with is one of the biggest costs in building a shed. The next biggest cost is labor.
Avoid Prefab Shed Kits
A DIY cheap shed build is cheaper than a prefab shed kit. A cheap shed can be built for as little as $500 and allows the flexibility to source materials, plan and design, and create your storage shed the way you like it. Basic prefab shed kits start around $1000 and are not already assembled.
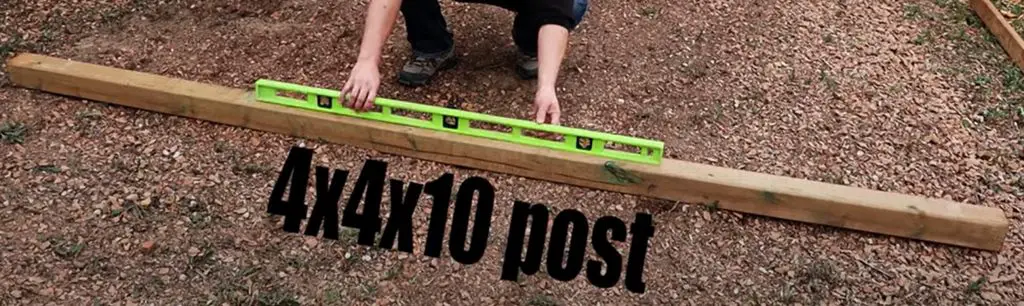
Pick The Right Pressure Treated Lumber
Pressure treated lumber is something worth spending money on. It is resistant to rot and insects and will make sure the time and money you spend on building a cheap shed is worth it.
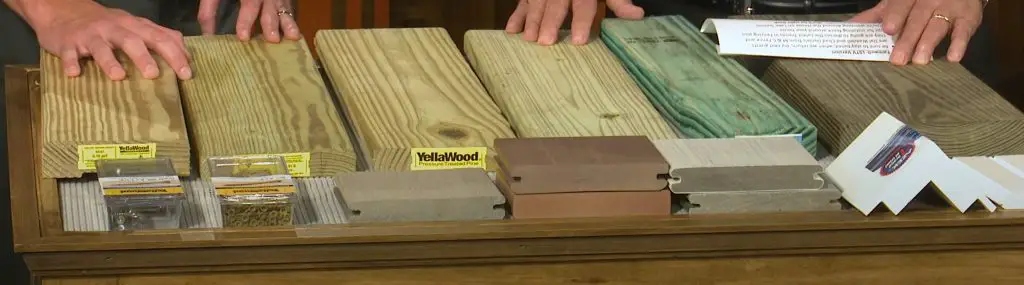
Termites, rot, and fungal decay can destroy your shed. Choose a pressure treated lumber that has been properly treated. There are a few ways lumber is treated. But the best for a shed is MCA, which is yellow wood and best for outdoor builds.
Micronized Copper Azole (MCA) is a copper-based wood preservative that is the best option for any part of the shed that touches the ground, or Ground Contact Use. The alternative is Above Ground Contact Use, which will rot when it comes into contact with moisture from the ground.
Since both types look the same you need to be sure what you’re buying is actually ground contact use MCA pressure treated lumber, especially if you’re buying second hand.
Buying MCA pressure treated lumber new costs between $12 – $15 for a 2″ x 4″ x 12′ piece, but check the cost in your local area because lumber cost tends to fluctuate.
How To Save Money on Wood
Wood is the most popular and durable material for DIY cheap sheds and wood sheds are easier to build yourself than using other types of materials. But with the cost of lumber tends to go up, not down, making wood the largest part of your budget. It also needs to be stained and maintained or it is prone to pests and rot, which adds to the cost of wood.
First choose one of these popular woods for a shed:
- Framing walls and the roof: C24 2 x 4 thick solid fir or spruce construction grade lumber
- Bottom plate of walls and floor, or any part that touches the ground: MCA Pressure-treated lumber
- Framing walls and roof: Pallets
- Sheath Walls and Roof: Oriented strand board (OSB)
- Shed floor: Exterior-grade plywood
- Exterior sheet wall siding panels: Plywood siding panels, like T1-11
Next, check your local area for deals. Call lumber yards, home improvement and big box stores, and check online with local marketplaces like Facebook Marketplace, Craigslist, and Ebay.
Pallets
Pallets are cheap or free, but they can be hard to find in good condition. A shed based on pallets is the most economical and affordable way to build a storage shed.
Cheap Metal Shed
Metal sheds are much cheaper than wood, but have their own problems. They will rust over time, may have sharp edges, and don’t look as nice as wood sheds. They are harder to customize than wood sheds and more difficult to add-on and change later. A tin shed costs an average of $1.50 to $2.50 per square foot.
Cheap Plastic Shed
Plastic sheds are also cheap options for sheds. They are light, durable, and require the least amount of maintenance. But a plastic shed doesn’t have the curb appeal of a wood shed and isn’t as secure.Save Money on Labor
DIY tasks can reduce the cost of labor and will save you money. Prefab sheds are marked up between 50% and 99% for the labor of cutting and creating the kit, but you still have to put the shed together. If you have rudimentary carpentry skills and are a decent handyman (or woman) you should be able to build a basic storage shed in a day. And this requires tools, some of them are expensive.
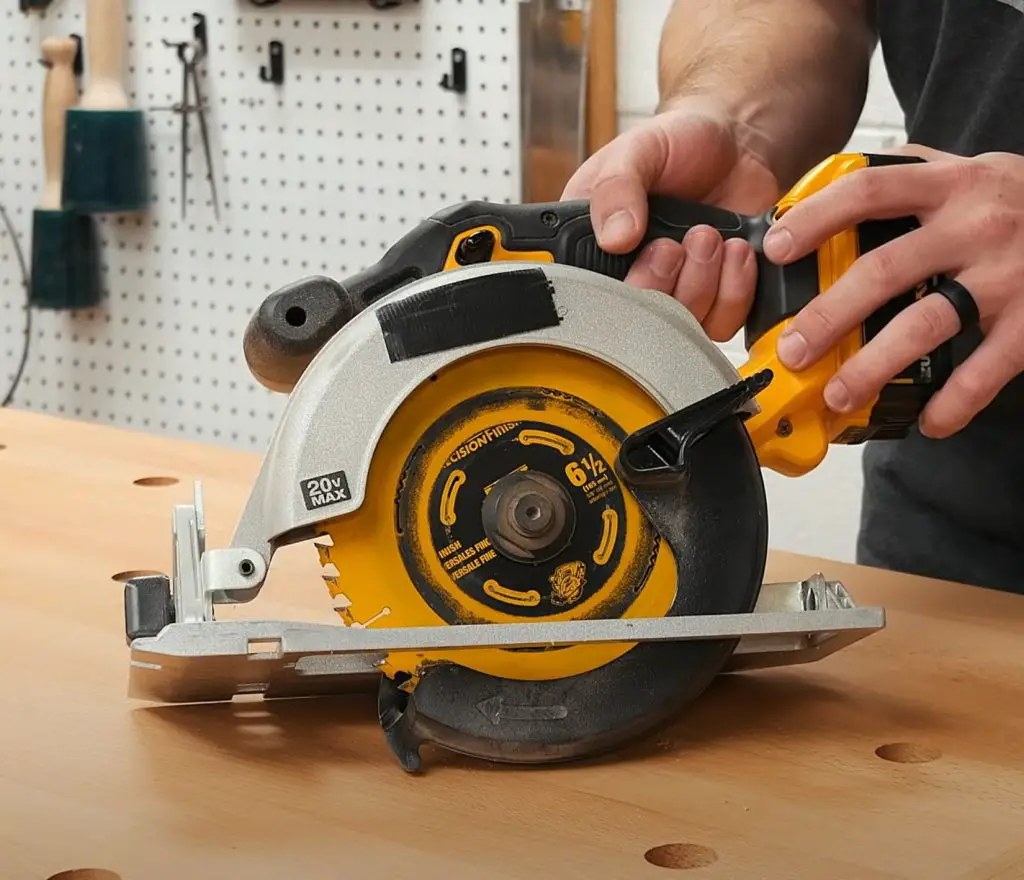
Cheap Tools To Build A Shed
Save money on the tools you need by borrowing and renting tools you don’t own.
The minimum required tools to build a basic wood storage shed are:
- Cordless drill
- Drill bits
- Extension cord
- Hammer
- Saw (circular, crosscut, or compound miter)
- Framing square
- Measuring tape
- Line and level
- Stakes
- Ladder
- Utility knife
- Nail gun (optional)
8 Basic Steps to Build A Cheap Shed
These are 8 basic steps to build a basic cheap shed for storage. We don’t dive into all the details in each step, but this is a good overview. If you want your shed to be used as a backyard office or liveable space, then you’ll need to take these extra steps.
1. Pre-Planning
Free and Cheap Storage Shed Plans
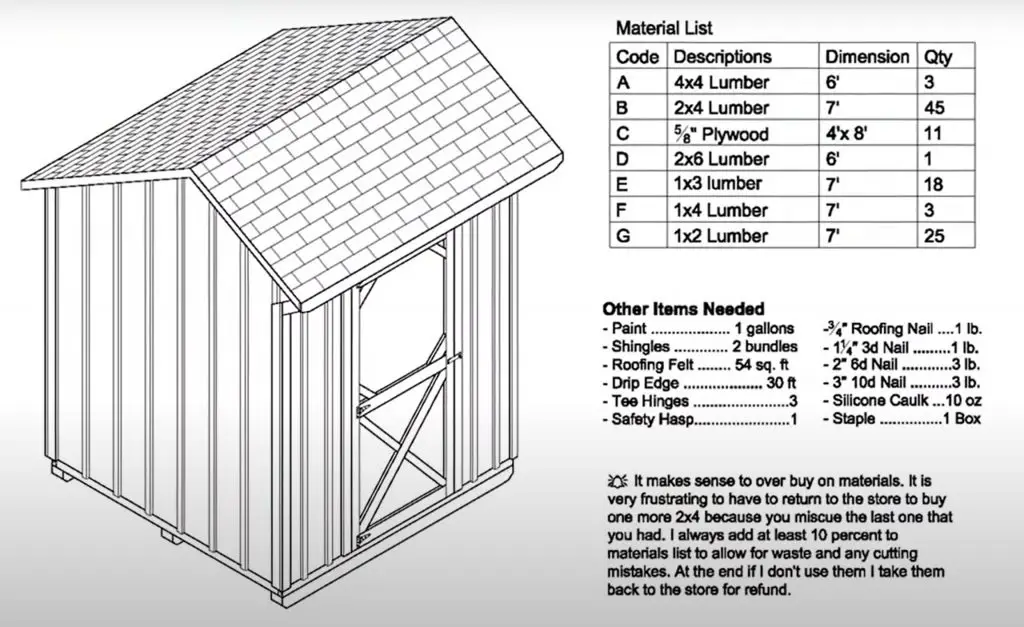
Finding a good design is a crucial first step because it outlines your entire building process. A good design will include all the materials you need to get started, how much land is required, and what kind of foundation you need to lay before starting the build. Find free or cheap storage shed plans online or at a home improvement store.
No products found.
Size and Location
To decide how big your storage shed needs to be, think about what you want to put in it and add more square footage for the future. We always need more space than we think we need. Consider that some counties may not require planning permission if your shed is under a certain size requirement.
The location needs to be level and dry. Avoid putting your shed in a palace where insects can get in easily, like near fruit trees or bushes. Also, keep it away from your neighbors fence.
Planning Permission and Permits
Not all cities or counties require planning permission if your shed is 1 story, 250 square feet or less, and does not require electricity or plumbing. But certain States require permits for every outbuilding, no matter the design. Check your county’s requirements on their website.
Some counties require neighbors to sign off on shed construction projects before you start.
2. Foundation
Any good shed has to have a strong foundation. It will keep it protected from the ground when it freezes, frost heaves, rain water, and keep it secured to the ground during the next big storm. Rake the area and check that the ground is perfectly flat. Verify it’s flat by using your level and the piece of lumber you’ll use for the floor framing to see if it’s level.
There are a few ways to secure a storage shed to the ground. The shed base can be anchored to a concrete slab, into soil, or into a gravel foundation. First decide if you need it to be permanently secured or whether you want to have the option of moving it.
Cheap DIY alternatives include concrete or deck blocks. The best ways to secure a shed base to the foundation is with L brackets, expansion bolts, ground augers, concrete piers, wooden skids, tie down, and deck blocks.
3. Floor framing
Once the foundation is laid, the floors are next. Start by placing 2 or 3 skids, which are long pieces of lumber that the rest of the floor will build on. Joists are placed on top and at each end of skids and nailed into the frame which is on the top of joints. Lastly, nail the plywood flooring to the frame. The shed floor should never be framed unless it is larger than 6″ in width.
4. Wall framing
Wall framing involves laying out the plates, framing the door opening, and assembling the walls. Adding cheap insulation, like bubble wrap, hay, cardboard, or recycled materials will keep the temperature regulated, but for a cheap shed used for storage, it’s not necessary.
The most economical wall frame materials are C24 timber which is a soft wood used for construction. It is typically between 19mm and 300mm. If you use a thinner lumber, you risk losing a significant portion of your structure. Since the entire roof is framed by the shed walls, they need to be strong. If you live in a place with heavy snow loads, consider a wall that is at least 2×3 inches thick. We recommend 2” x 4” pressure treated lumber.
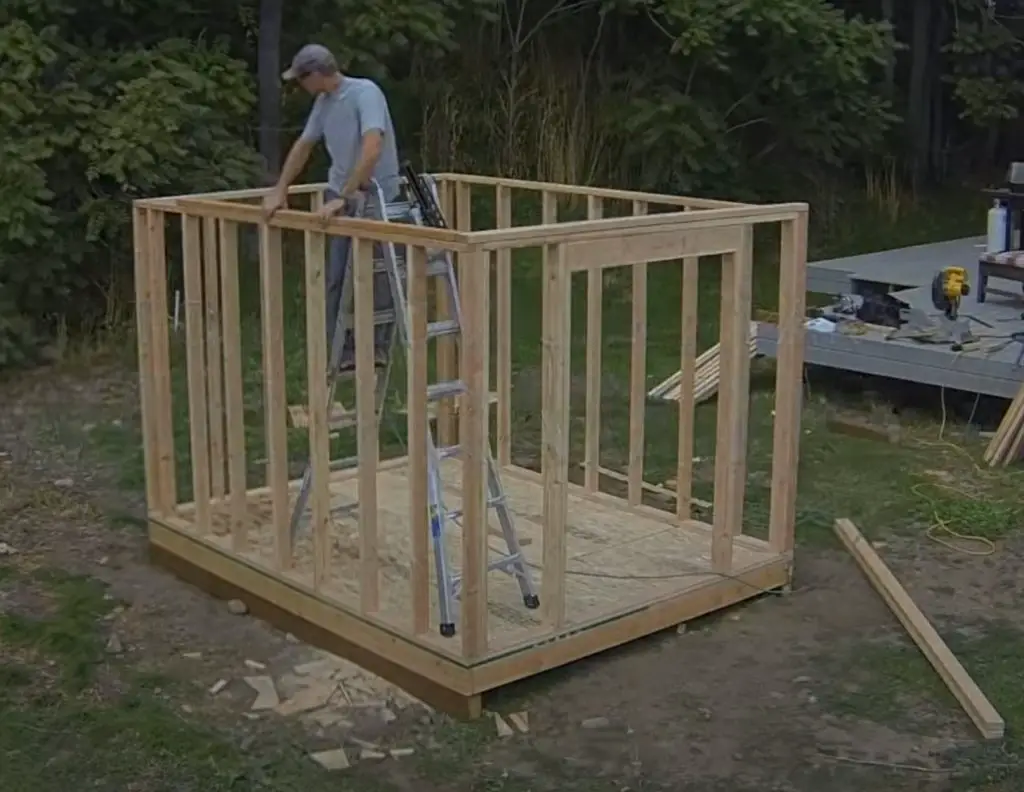
You’ll need to measure and cut the wood to the right size. The boards should end up being snug against each other. Mark wall studs on the top and bottom of the plates every 16 ¾ “ on the edges of the boards. Mark the door location and it you’re putting in windows, mark these locations, too. Crown the wall studs and nail the plates to the studs.
Build the door and window headers with OSB and plywood. Then frame the wall with the door opening. Cut a trimmer board and nail to the king studs. Stand the walls and attach them to the floor. Lastly, install double top plates.
5. Roof Framing
Cheap 2×4’s are great for the walls, but also work on roofs. Roof trusses are used to give your shed strength and a pitch, which is the slope of the roof. Rafters give your shed more storage space and are under the trusses.
To build and install a simple sloped roof, start by making the back wall shorter than the front wall. Measure the rafter angles then frame and install the roof. Add roofing sheets and lay a water resistant membrane. Lastly, add facia.
6. Door and Window Construction
Doors
Exterior Doors are costly. A quick glance at your neighborhood home reno store shows they cost between $200-600 each. You can build your own shed doors for less by using OSB, 2 x 4 pieces of lumber, siding boards, hinges, locking mechanisms, door handles, and trim pieces.
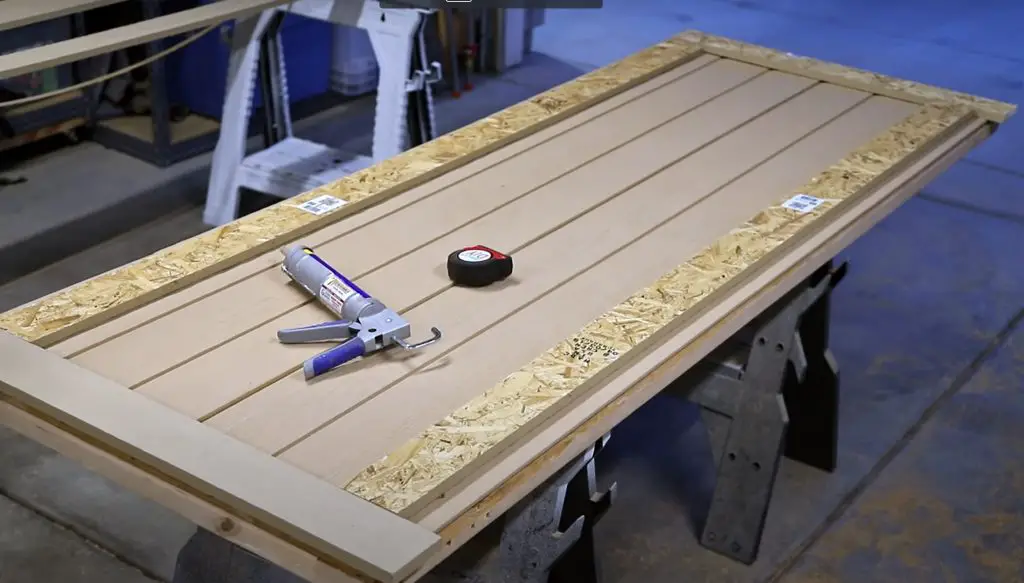
Measure the door opening in the wall frame and build the door frame. Cut the wood to match your measurements then assemble the frames. Fit the frame into the door opening to be sure it fits. Then nail the siding and trim to the door frame. Secure a piece of OSB to the backside of the frame to make it stronger. Lastly, install hinges, locks, and handles.
Windows
If your goal is to keep your shed cheap, then skip the windows. Even cheap windows add an additional cost to your shed. If you need some light inside the shed, use a solar light or cheap battery operated light insead.
7. Roofing
A properly shingled shed roof will protect your shed and all the time and money you spent building it. Asphalt shingling is an inexpensive alternative to roof your shed efficiently. Save time and money by doing it without a blowtorch.
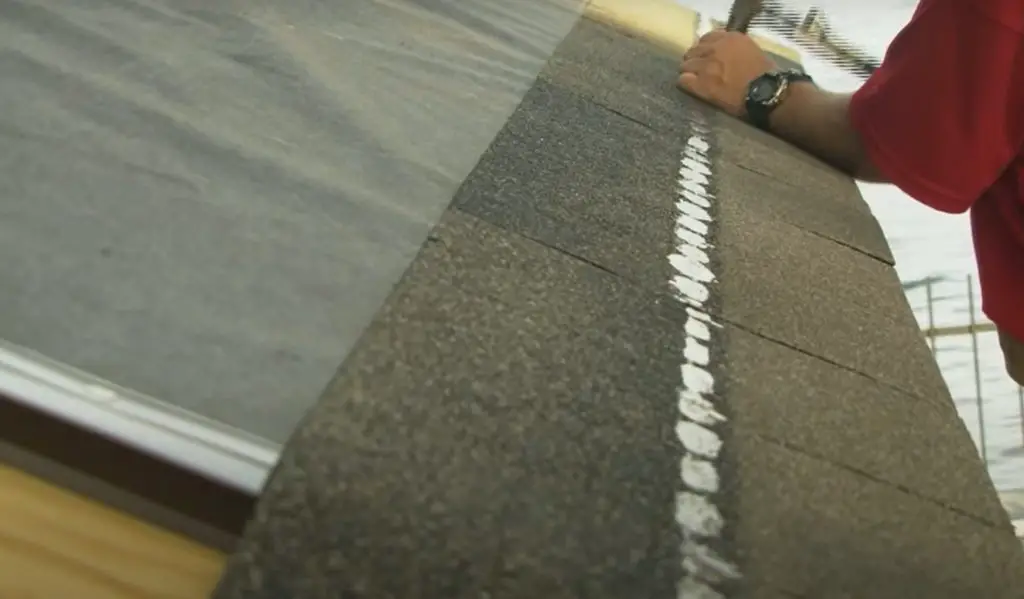
Start by nailing the roof felt to the roof, then install the drip edge to allow water to run off the roof. Then install shingles starting on the bottom with a starter row and lining up each row by alternating notches. Trim the overhanging shingles, cap the ridge by nailing down shingles to the peak of the roof.
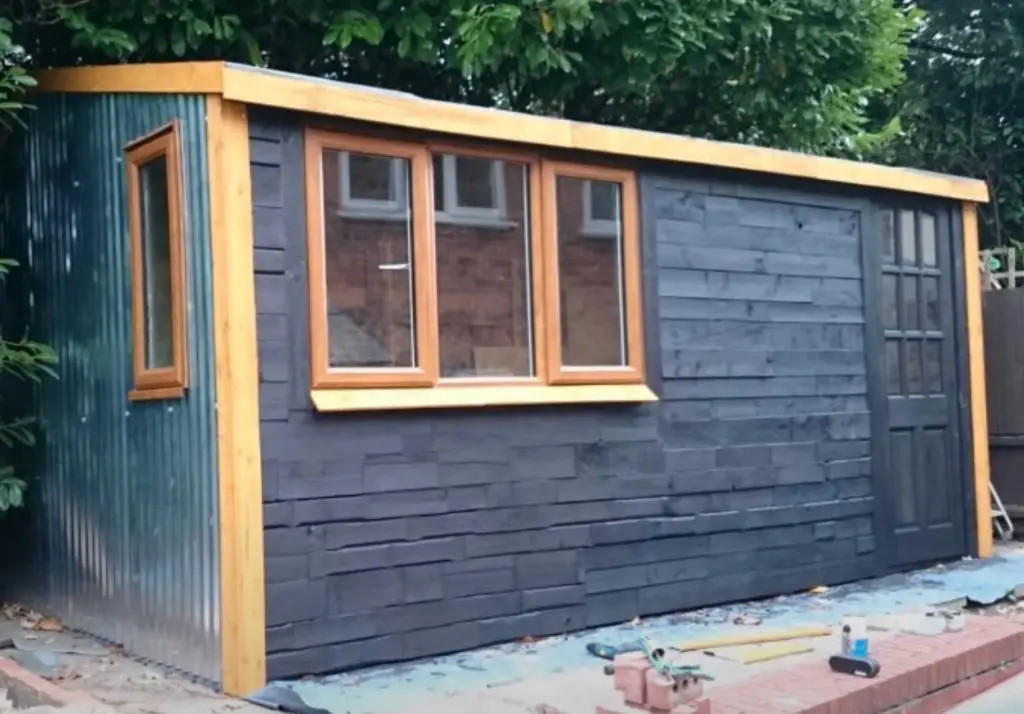
8. Exterior walls : Cladding, Paint, or Stain
Shed Cladding
Cladding means any extra coating that is added to the exterior of a building. You need to add cladding to protect your shed from the elements and regulate the temperature inside the shed. Popular choices for a shed are vinyl, engineered wood siding, T1-11 siding (OSB and plywood), fiber-cement siding, metal siding, lap siding, stones, and shingles.
The cheapest shed cladding options are T1-11 siding which comes in 2 options: OSB and plywood. OSB isn’t going to hold up well over time, especially if you live in a place with a lot of moisture. OSB is basically wood chips glued together and it won’t hold up well over time. Plywood is more durable and still cheap.
Plywood is your best choice for cheap shed cladding and it saves you more time and money by not requiring a sheath, like other cladding options do. It does need to be stained and painted to look nice and be weather-resistant.
Shed Paint or Stain
To protect wood cladding from the elements it needs to be stained or painted. Decide which option is best for you with this simple guide to paint vs stain.
Staining is cheaper than painting because you only need to buy wood stain. Painting requires wood preserver and primer plus paint, which adds to the cost of the build.
No products found.
Final Thoughts
Building a cheap shed can be done by using a few simple ways to source material and save on labor by doing it yourself. Basic storage sheds only need 8 basic steps to be used for equipment, boxes, or an overstuffed garage. Plan and choose a shed design, lay a foundation, frame the floor, walls, roof, and doors. Add trusses, rafters, and the roof then asphalt shingles as an inexpensive roofing option. Lastly, protect your shed with exterior cladding and wood stain or paint.